Guide to Using TMProxy Manager with AdsPower
Why use TMProxy Manager with AdsPower?
TMProxy Manager helps keep the proxy’s IP address fixed at a single address. Suitable for managing multiple profiles on AdsPower.
Guide to Using TMProxy Manager with AdsPower with Images
Download and Installation Guide
Search “Download AdsPower” on Google or click “Download Software” below.
After downloading, run the installation file and follow the simple steps like installing other software. Create an account or you can log in directly with your Google account.
Note!
Free accounts are limited to a maximum of 5 profiles for the lifetime of the account.
Guide to Using TMProxy Manager with AdsPower
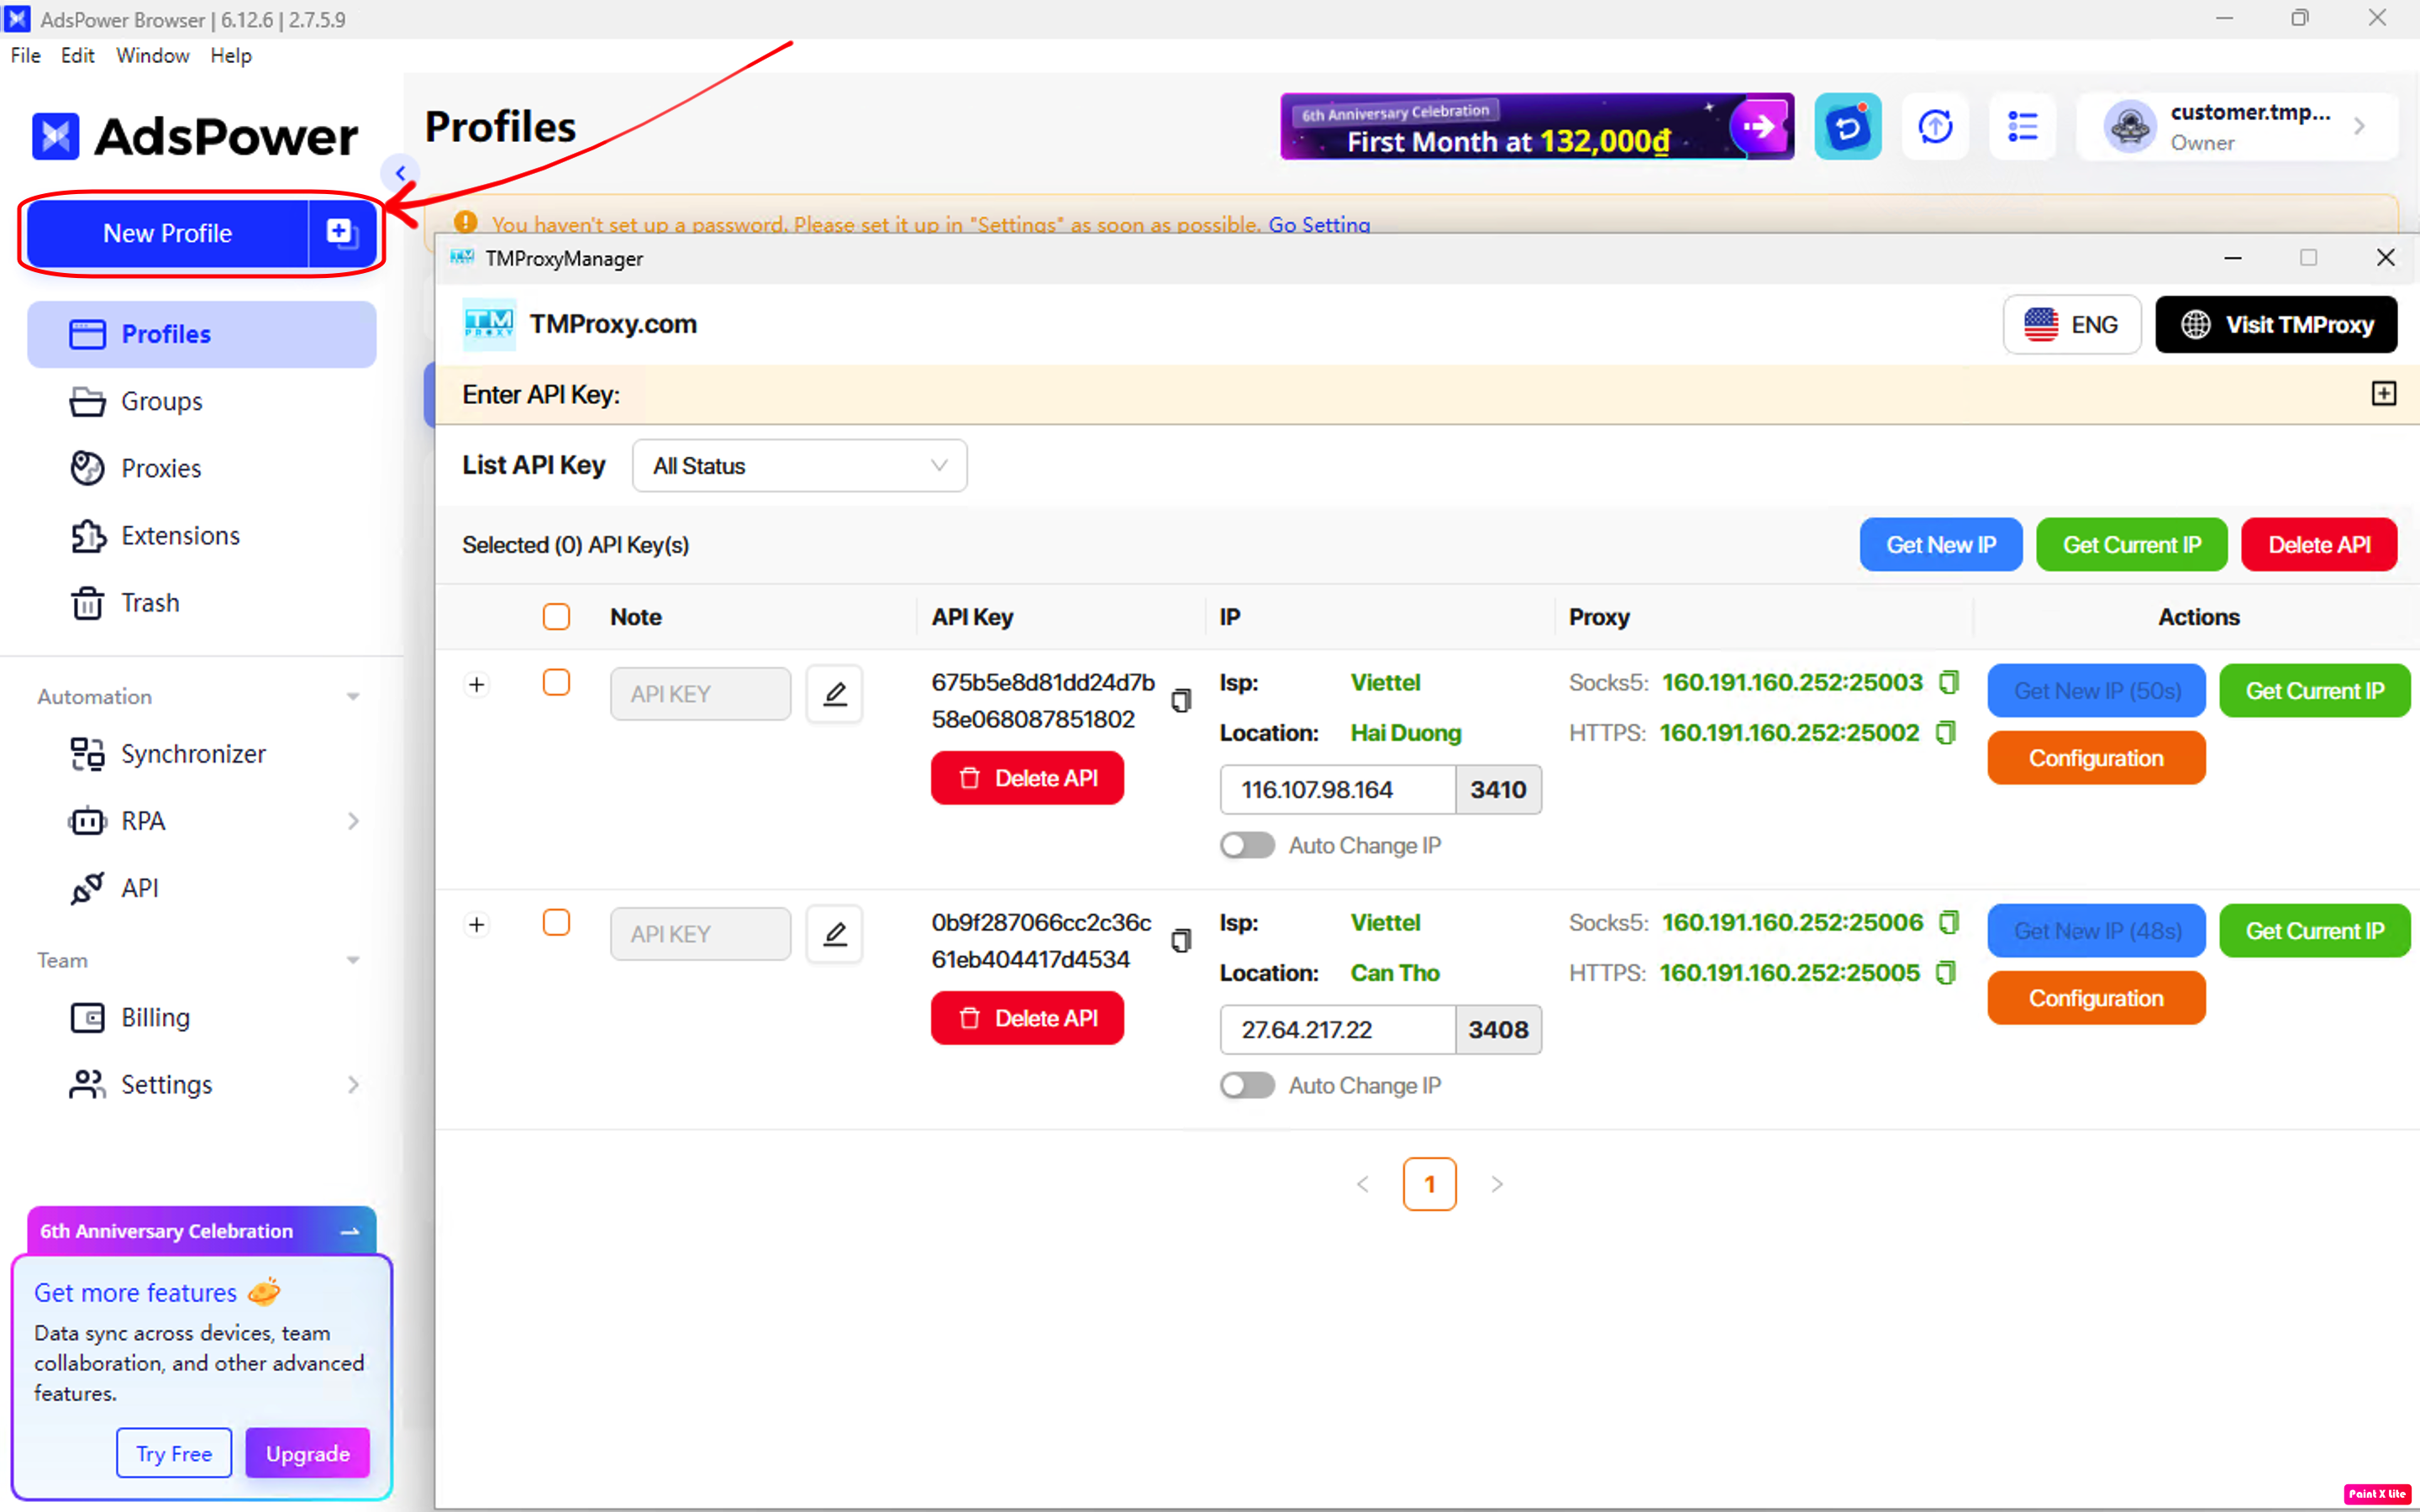
Add the API Key to the TMProxy Manager software and get the proxy information. Detailed instructions 👇
Then click “New Profile” to add a new profile.
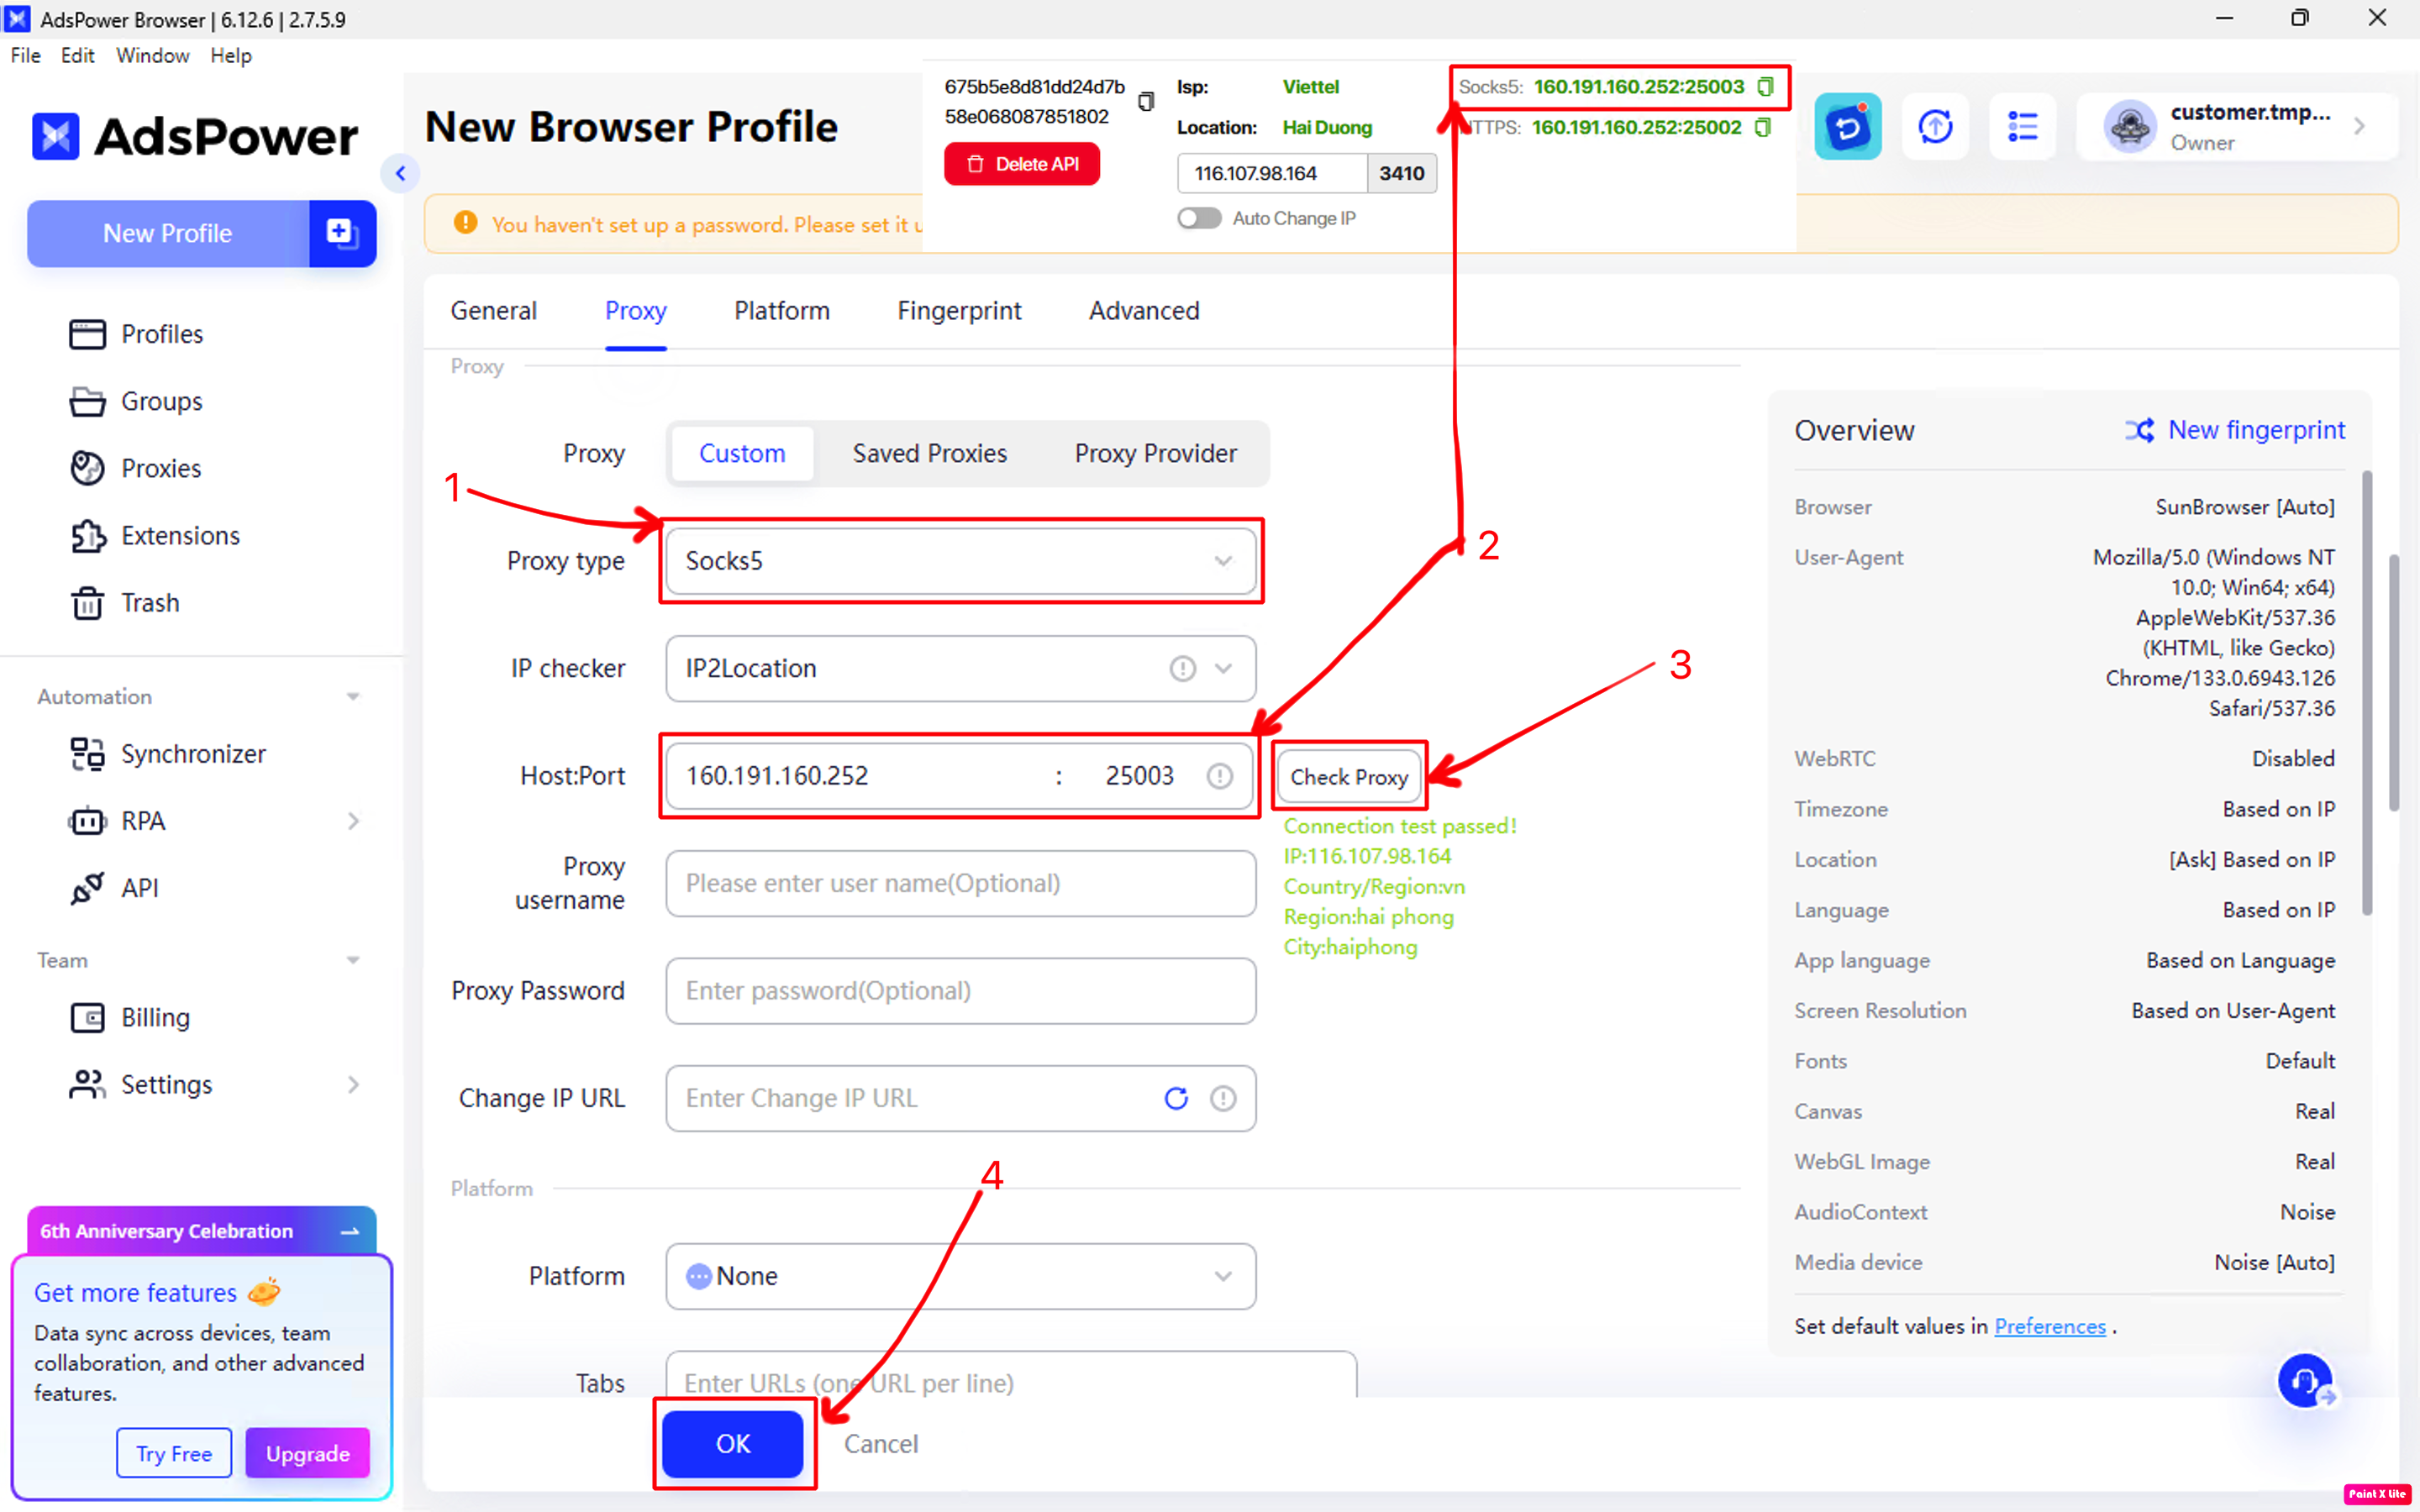
 Configure “Profile1” according to your needs. Then click on the “Proxy” section.

- In the “Proxy type” section, select Socks5 or HTTP.
- Paste the proxy information you just obtained from the TMProxy Manager software into the “Host:Port” field.
- Click “Check Proxy” to check the proxy connection.
- Continue setting up the configurations below according to your needs.
- Then click “OK” to complete.
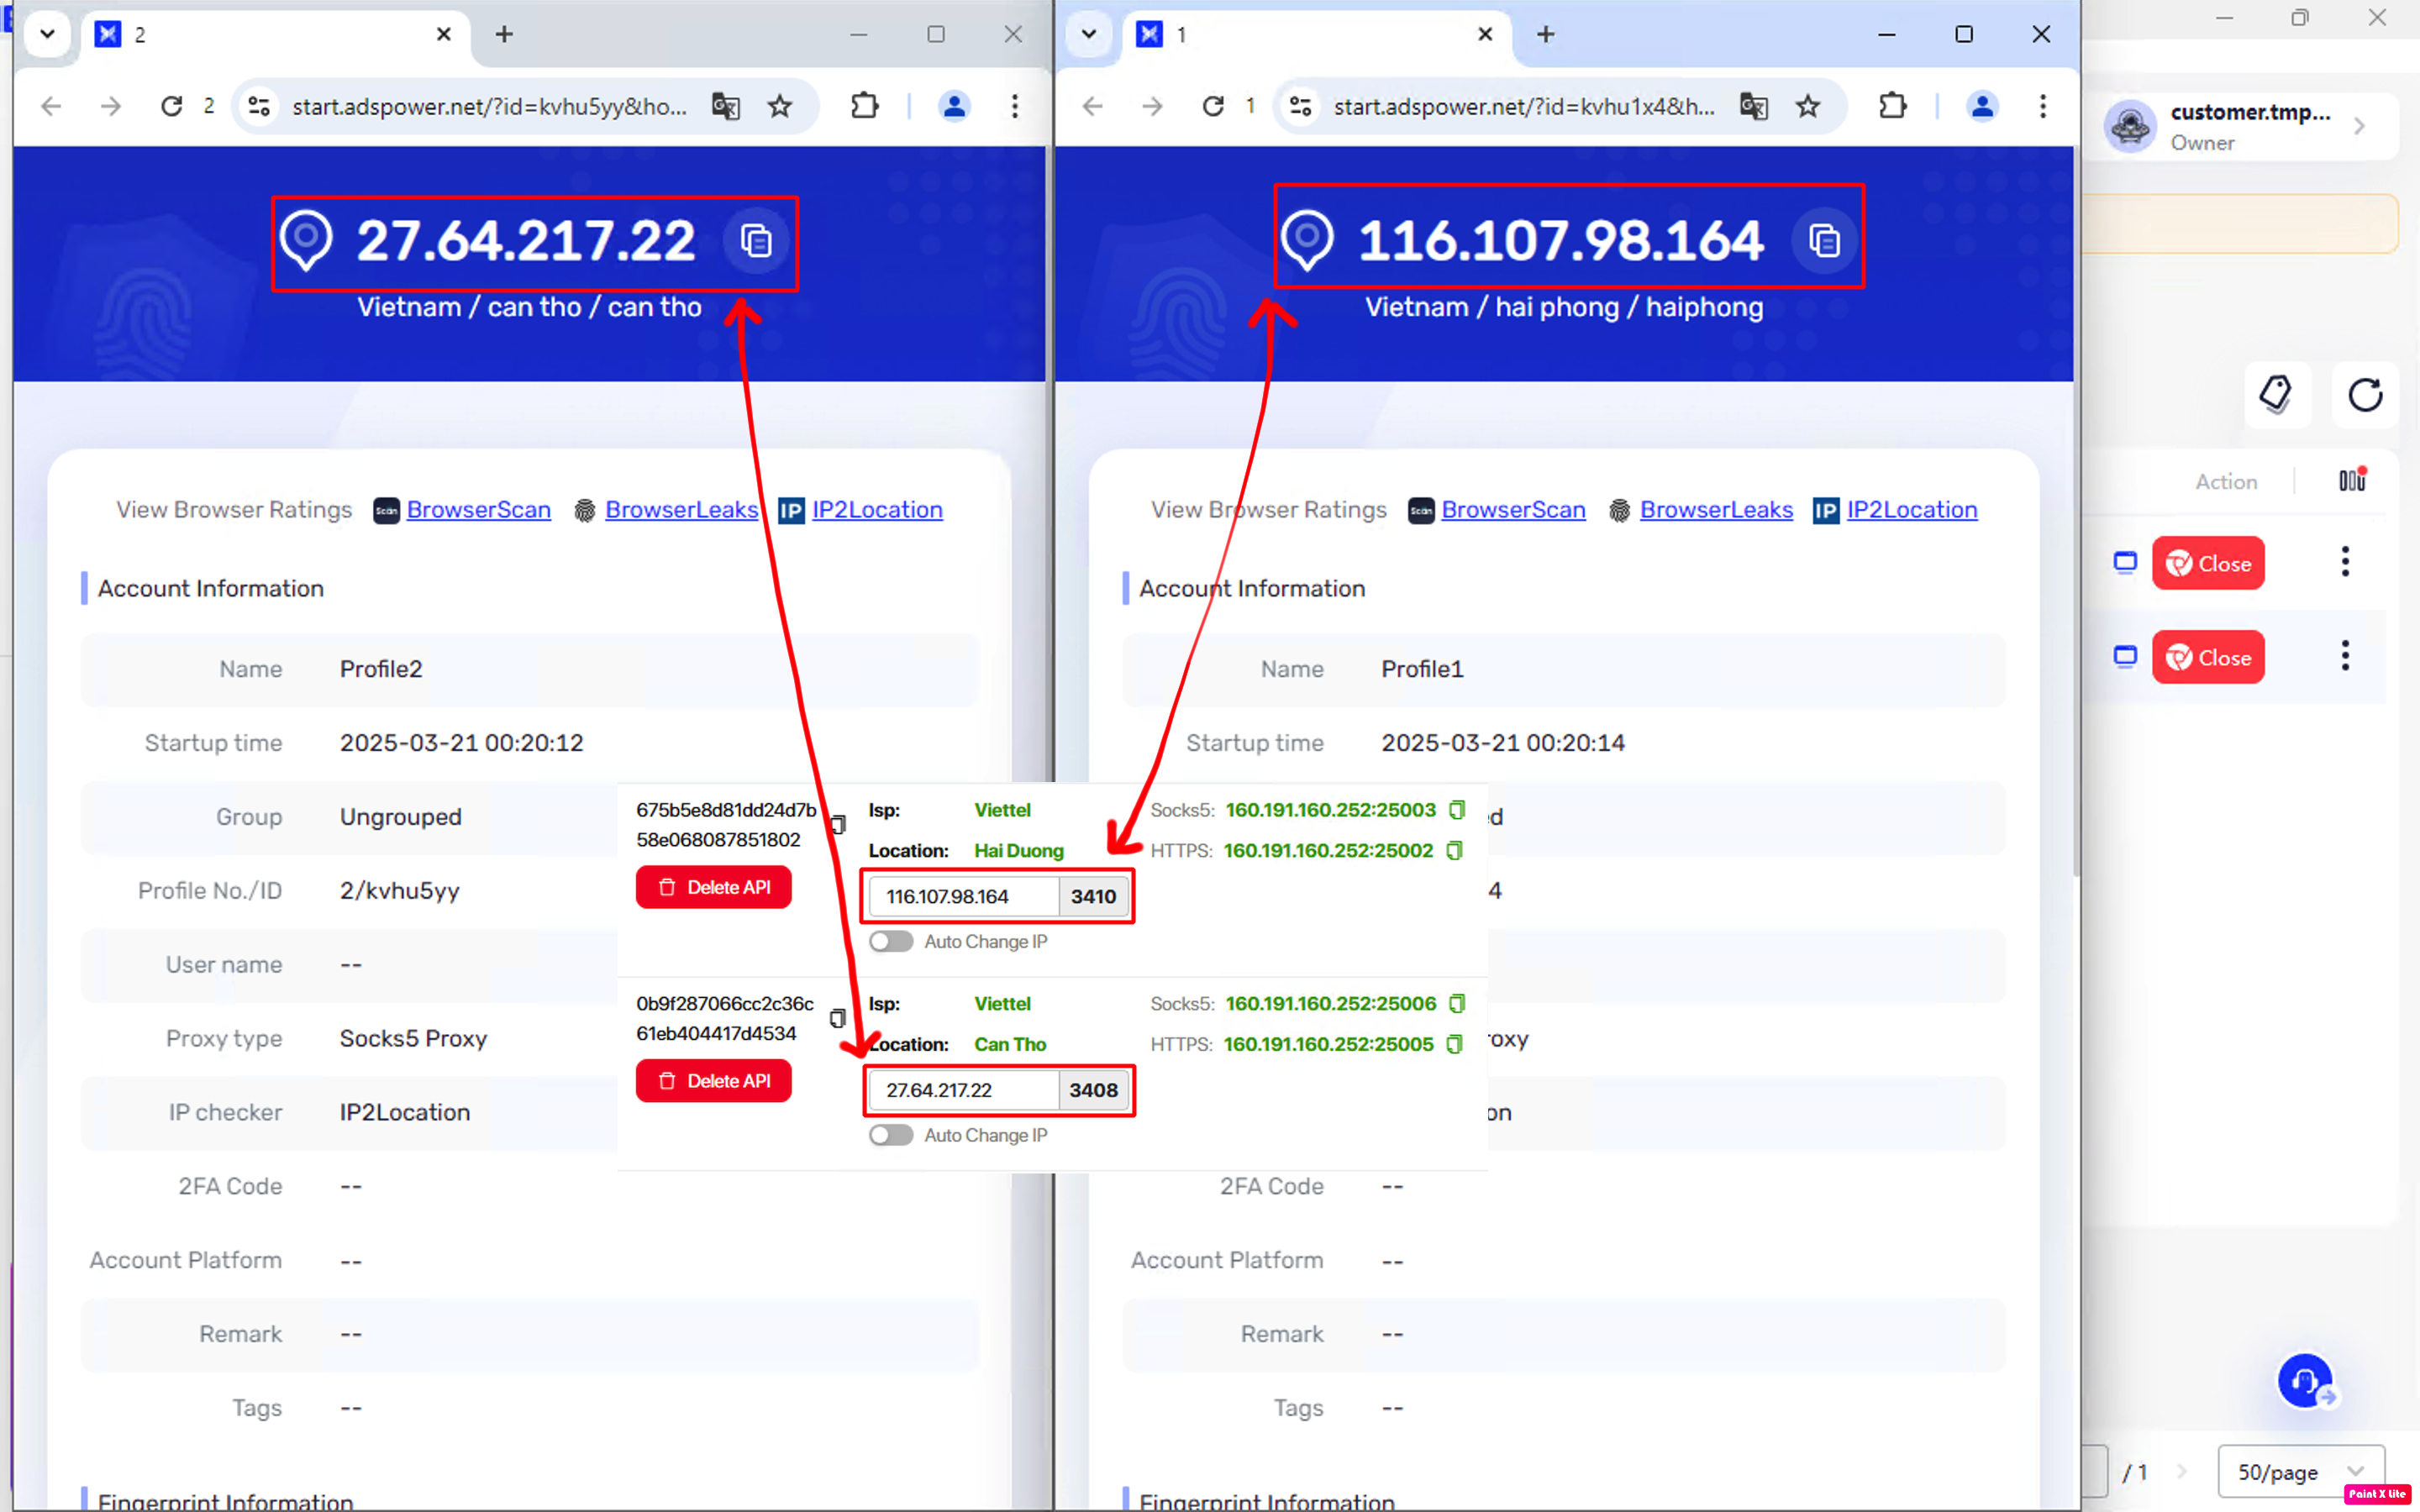
- Do the same with “Profile2”.


- Click “Open” on both profiles to enjoy the results.
 Here is the result. Very simple, isn’t it? 😁
This is the article Guide to Using TMProxy Manager with AdsPower. It’s also quite simple, you can experience other functions that we haven’t implemented. Good luck!
We also have many tutorials on using http proxy / socks5 with different software and tools. Please click on the link https://docs.tmproxy.com/guide/
Get started with us at:
- website: https://tmproxy.com/
- Fanpage: https://www.facebook.com/TMProxy