How to Use ALGO Proxy
Note!
The Web App interface may differ slightly from the guide but will not be significantly different
Guide to Using ALGO Proxy’s International Proxy Service (formerly TMProxy)
The International Proxy Service of ALGO Proxy supports 2 methods to change IPs. You can choose the one that suits you best.
Change IP via API
Send a API Request to ALGO Proxy and we will change the Proxy for you. This feature is especially suitable when you have finished your current task and need to switch to a new one.
To configure Rotating Proxy by command, go to International Proxy ⇒ Proxy Management ⇒ Click the “DO NOT AUTO CHANGE IP” button
After that, get the “URL change IP” and call it to receive a new Proxy. Note that the usage time must be at least 60s apart.
URL change IP structure:
https://api.vn.tmproxy.com/v1/change-proxy?proxy_token=[Your Token]Example response when using URL change IP successfully:
{"code":1,"message":"ERROR_CODE_SUCCESS","data":{"ip_allow":["116.111.184.89"],"location_name":"Shandong, China","socks5":"15.235.219.139:15081","http":"15.235.219.139:15081","expired_at":1749373939,"username":"vnALGO Proxycom","password":"vkm7ue7kdcmt9cxgwovd","public_ip":"112.224.196.20"}}Possible errors when using URL change IP unsuccessfully:
| code | message | explanation | solution |
|---|---|---|---|
| 8009 | ERROR_CODE_PROXY_MANAGER_SUBSCRIPTION_PROXY_TOKEN_NOT_EXIST | Invalid Token | Check Proxy Token |
| 7501 | ERROR_CODE_PROXY_TOKEN_MIN_USAGE_TIME_NOT_REACHED | Not enough time to get new IP | Wait until minimum time (60s) |
| 7502 | ERROR_CODE_PROXY_TOKEN_PROXY_OUT_OF_STOCK | Proxy out of stock | Switch or add location |
| 8006 | ERROR_CODE_PROXY_MANAGER_SUBSCRIPTION_SUBSCRIPTION_EXPIRED | Subscription expired | Renew subscription |
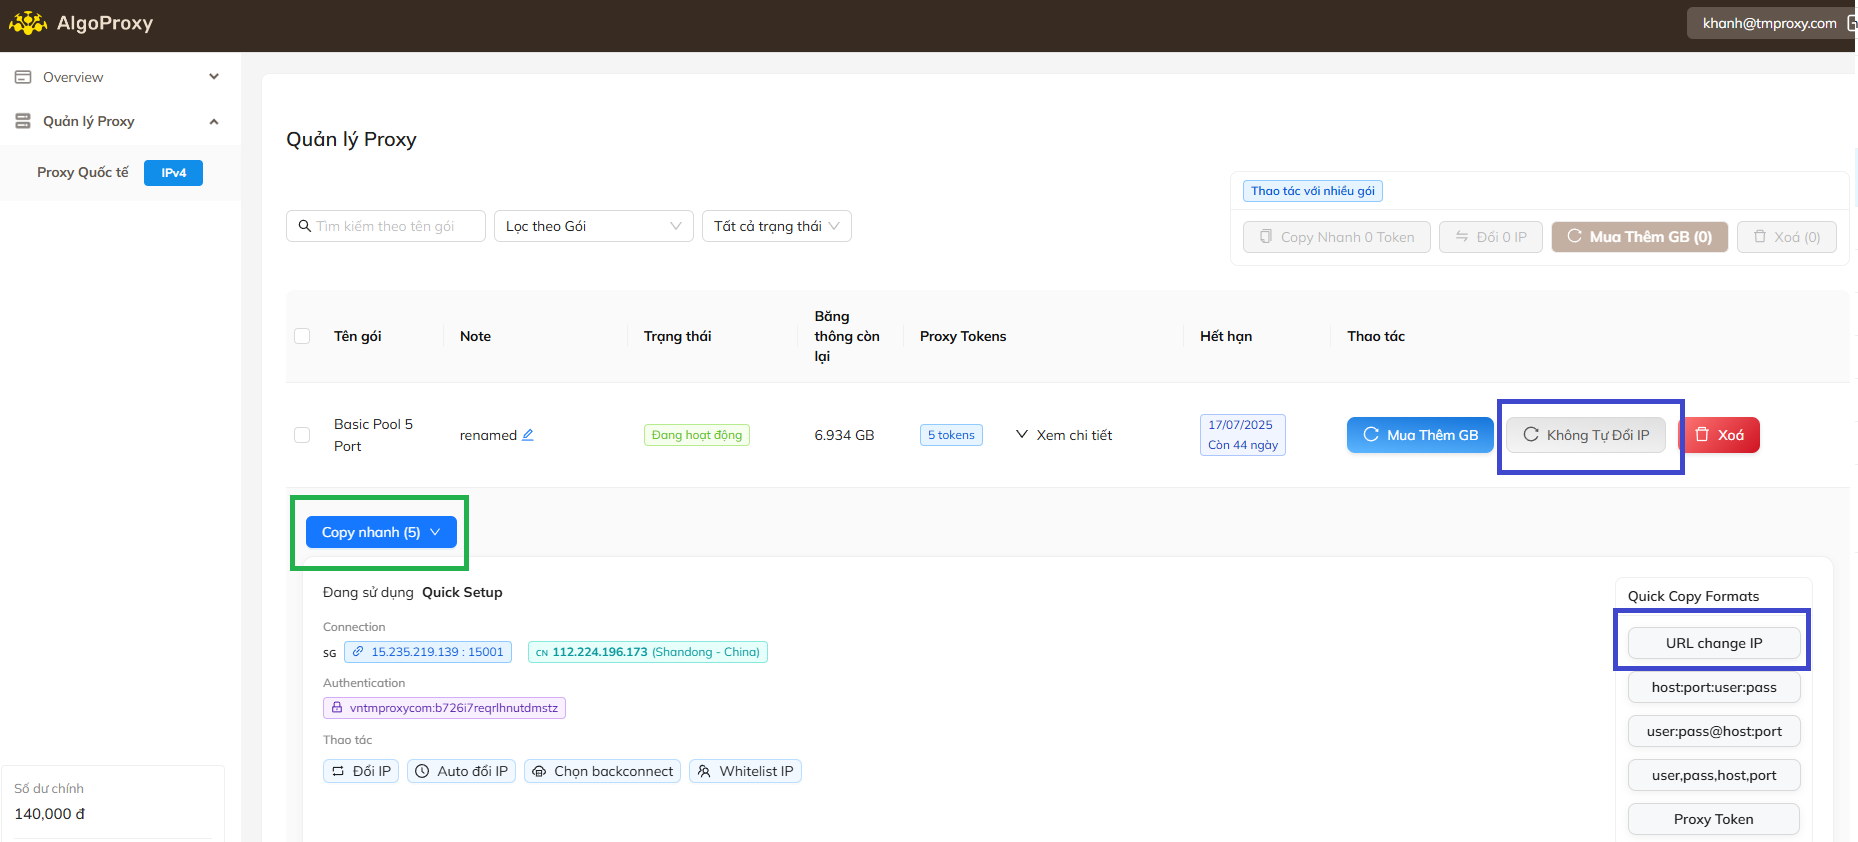
Or click the “Change IP” button
You can also get current Proxy info using API
https://api.vn.ALGO Proxy.com/v1/current-proxy?proxy_token=[Your Token]Possible errors when using URL get-current Proxy unsuccessfully:
| code | message | explanation | solution |
|---|---|---|---|
| 8009 | ERROR_CODE_PROXY_MANAGER_SUBSCRIPTION_PROXY_TOKEN_NOT_EXIST | Invalid Token | Check Proxy Token |
| 7503 | ERROR_CODE_PROXY_TOKEN_HAS_NO_PROXY | Token has no proxy | Get a new Proxy |
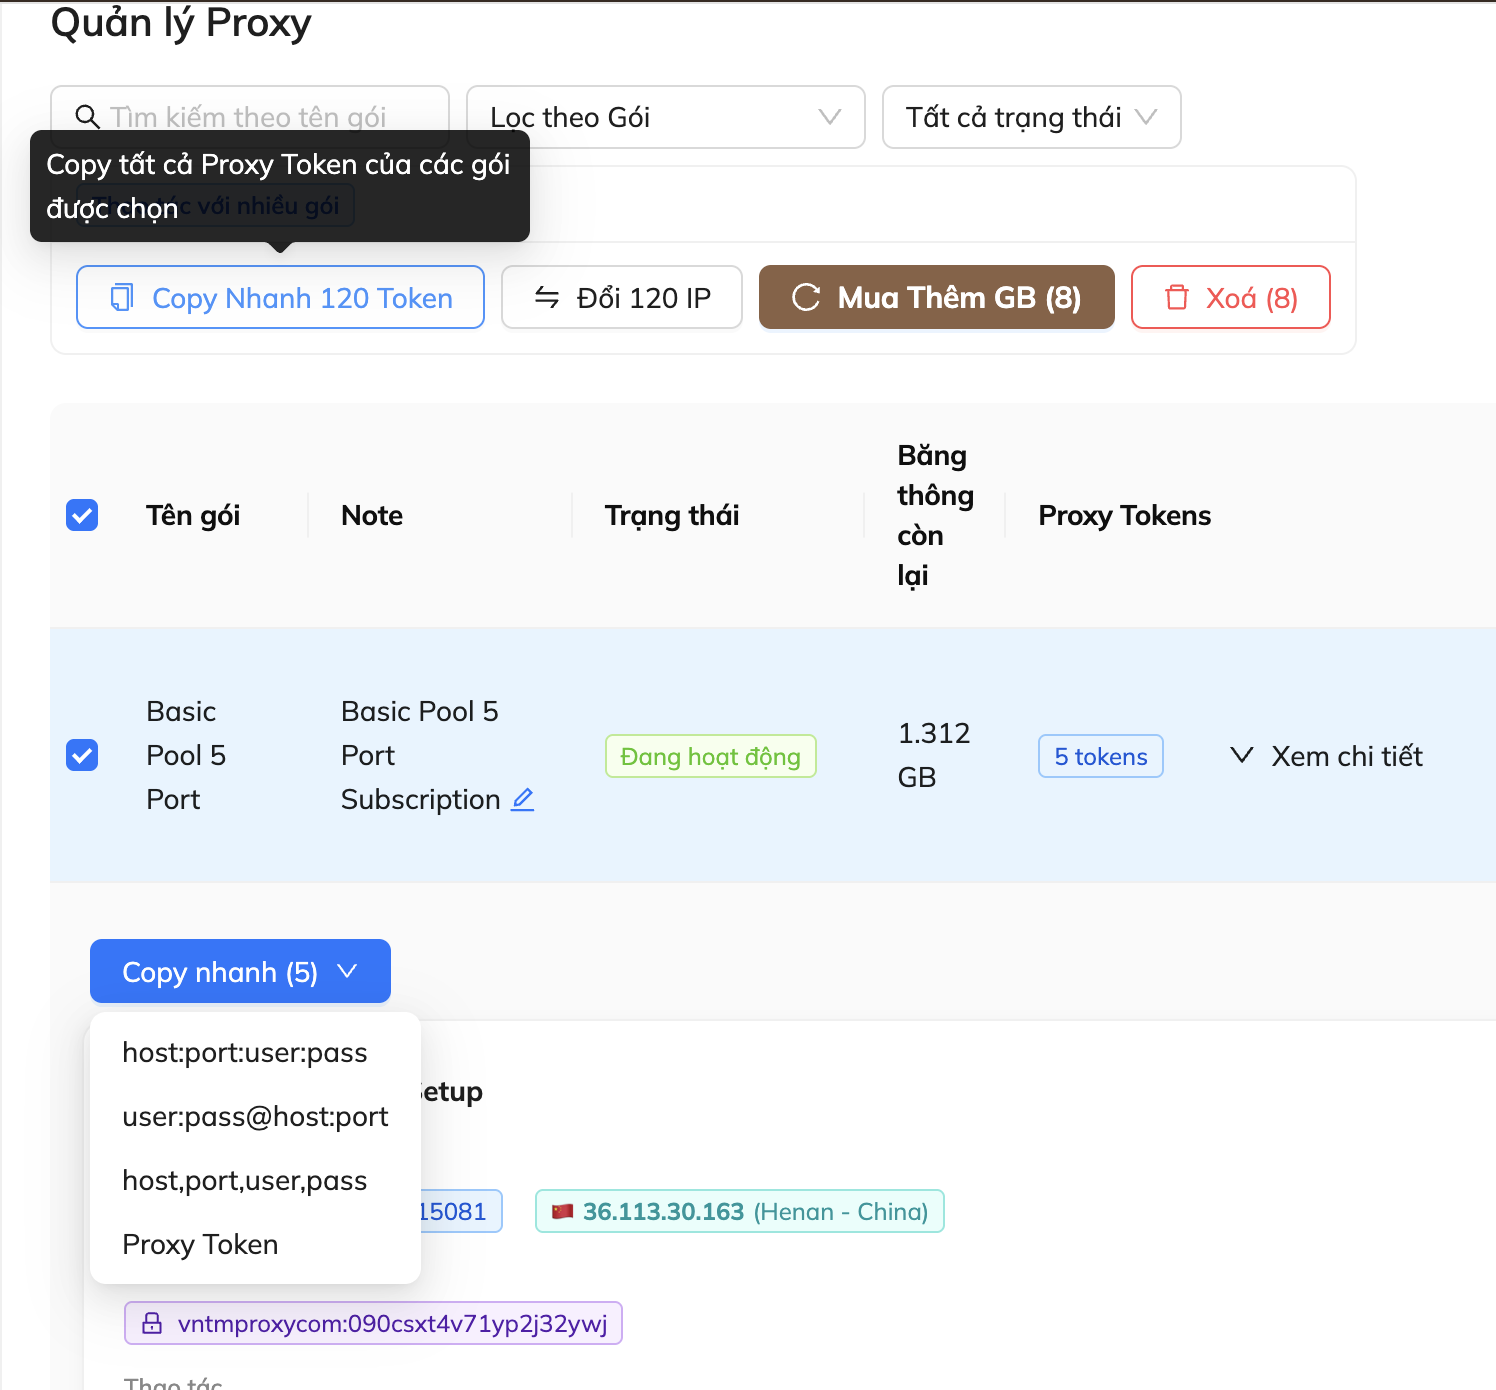
On the left of each package, there is a checkbox. When you click it, you can perform actions for all selected packages such as “Copy Token”, “Change IP”, “Buy more GB”, or “Delete” the selected Tokens.
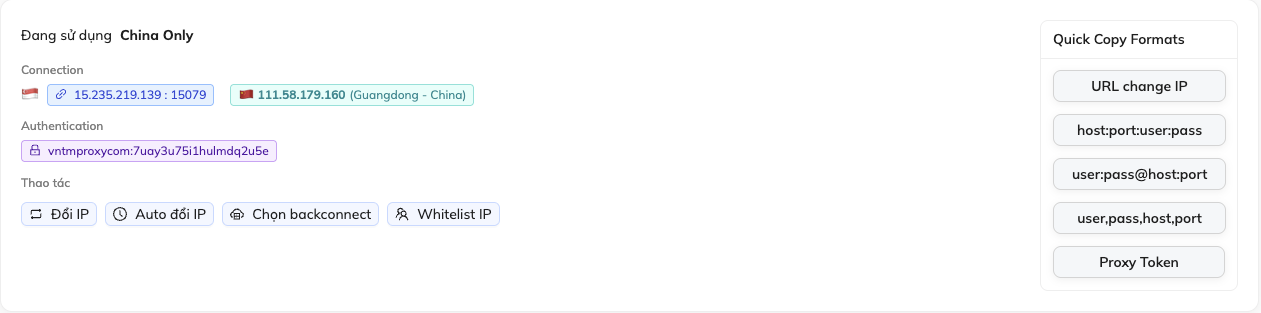
Quick Copy Formats: We also provide ready-made Proxy formats suitable for many platforms. Just click on the desired format to copy automatically. You can also use the “Quick Copy” button to copy all formats for all Tokens in the package.
Change IP by Scheduled Interval
You can set a fixed time and we will automatically change the IP when the time comes, without having to change the configuration or use any extra logic.
To configure scheduled IP change, go to International Proxy > Proxy Management > Click the “AUTO Change IP” button

Here you have:
- Quick Setup: Quick config for quick testing
- Create reusable configuration
- Select existing configuration
We recommend using “Create reusable configuration”
Note!
If you use “Quick Setup”, just enter the change time, select the desired location, and click “Confirm” ⇒ IP will be changed each time the countdown completes.

To create configuration, please select:
- Configuration name: Choose an easy-to-remember name
- Proxy Location: Depending on your plan, you can select multiple locations. We will provide IPs within the locations you have selected.
- Auto change IP when old IP is lost: If you don’t want service interruptions due to IP loss (can happen due to ISP or local issues), enable this option.
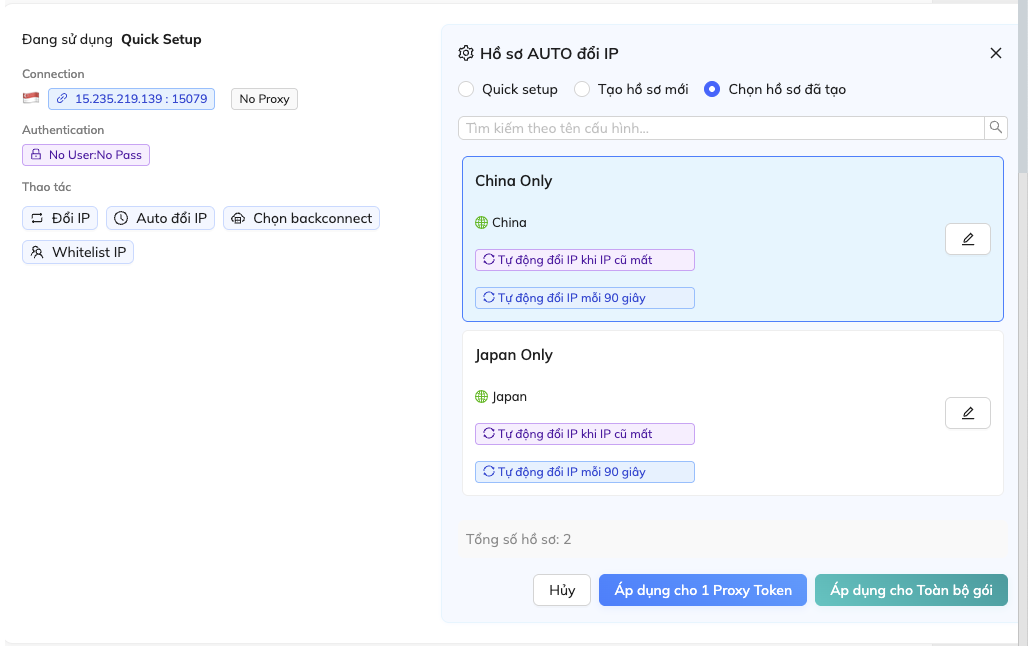
Manage created configurations:
- Search by configuration name: Find configuration by the name you created
- : Edit created configuration
- Apply to 1 Proxy Token: Apply configuration to the currently edited Proxy Token
- Apply to entire package: Apply configuration to all Proxy Tokens in the current package
Other Settings
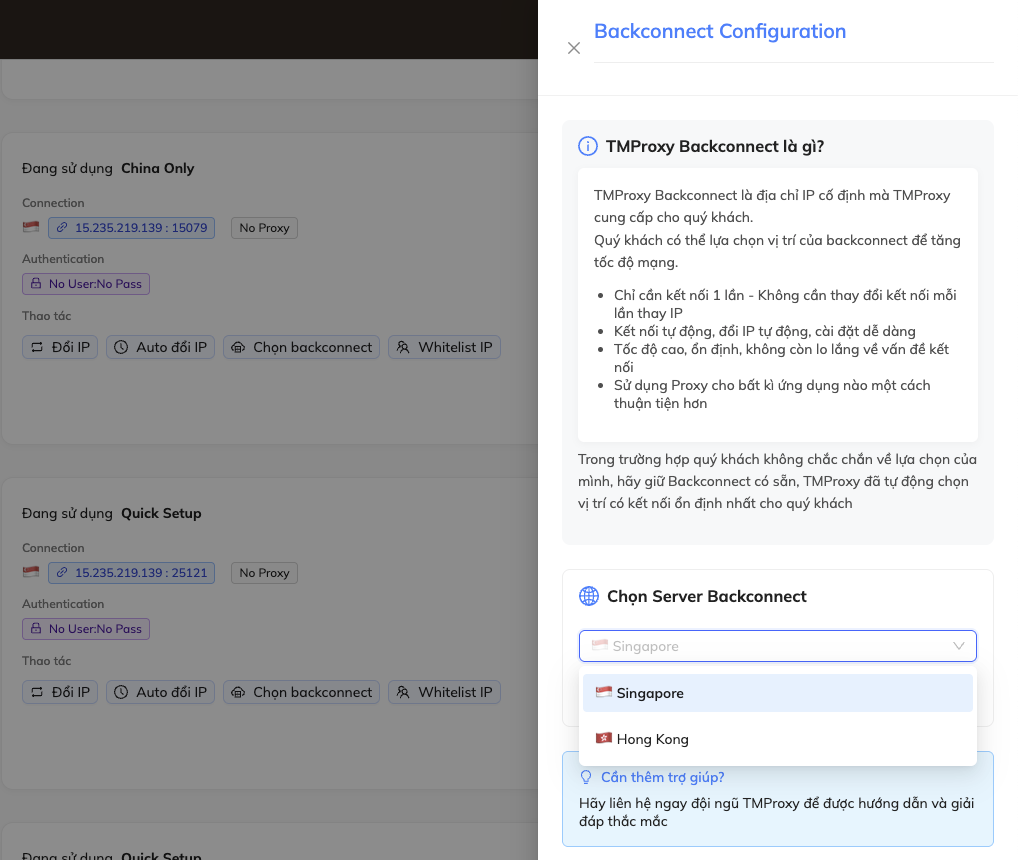
Select backconnect:
- BACKCONNECT by ALGO Proxy means we provide you with a fixed IP address for each Token, making it more convenient for you to use proxies.
- Each time it rotates, the backconnect IP address remains unchanged but the actual proxy IP is rotated inside our system.
- Multiple locations to choose from in case of disconnection
- Very simple setup: Click Select backconnect ⇒ Select Backconnect Server ⇒ Choose the desired location (Singapore, Hong Kong, Japan,…)
Note!
Lower tier packages have fewer backconnect locations than higher tier packages
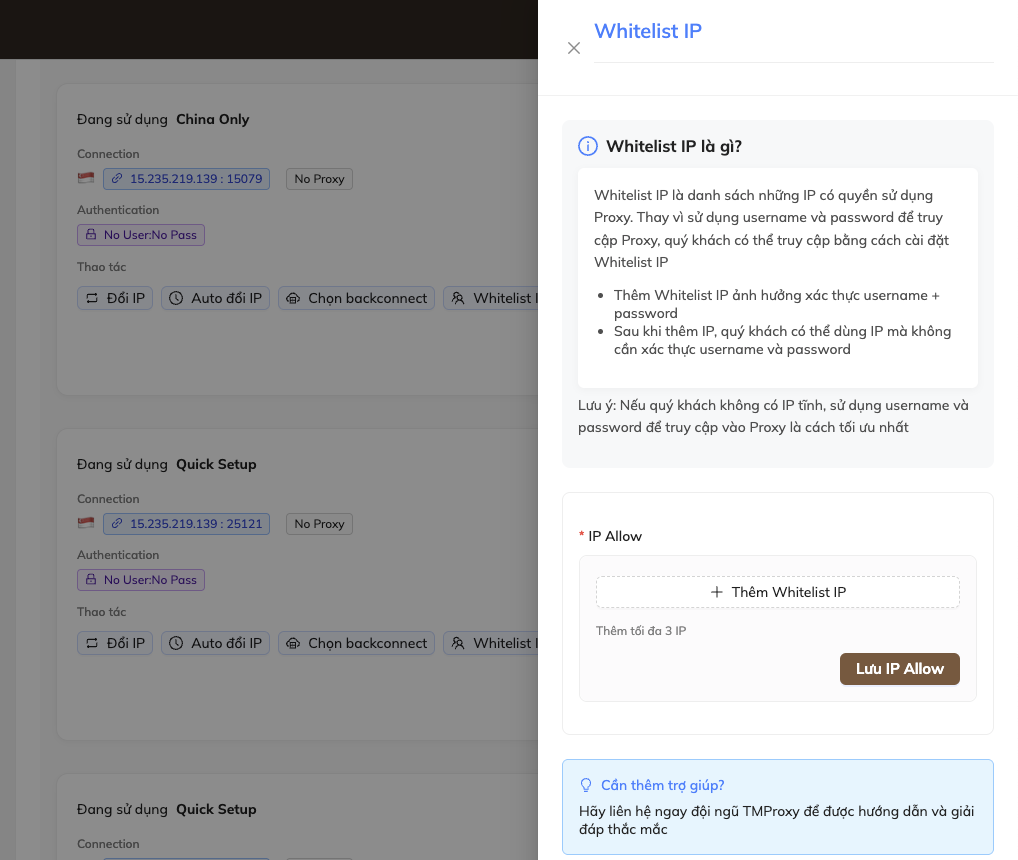
Whitelist IP: Helps you use proxies without needing to authenticate with username and password
Get proxy info and setup
Get proxy info
After setup
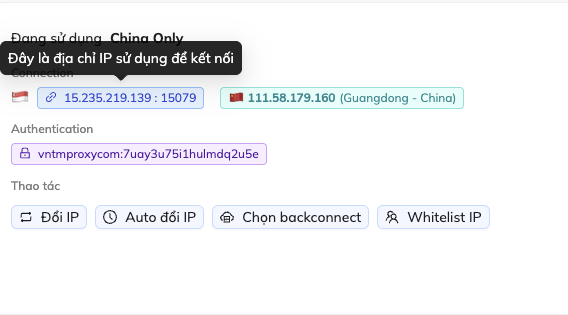
Connection: In this case, double-click host (15.235.219.139) or port (15079) to select each part individually. Triple-click to select the entire host:port (15.235.219.139 : 15079)
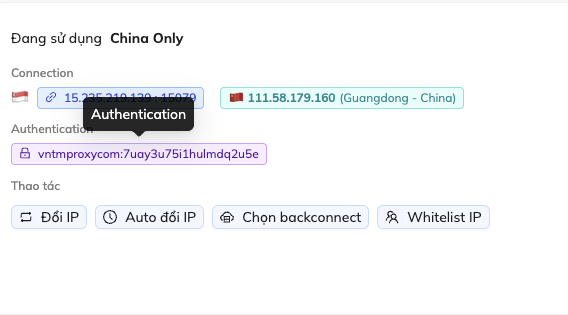
Authentication: In this case, double-click username (vnALGO Proxycom) or password (7uay3u75i1hulmdq2u5e) to select each part individually. Triple-click to select the entire username:password (vnALGO Proxycom:7uay3u75i1hulmdq2u5e)
Setup
Once you have the proxy info, simply add the proxy info into the software or platform you wish to use.
This guide ends here, see you in the next guide!